Installing Kubernetes Dashboard for microk8s on a Raspberry Pi Cluster
In this short post, I’ll show how you can install the Kubernetes dashboard for microk8s on a Raspberry Pi cluster. While numerous articles, posts and documentation resources on this topic can be found on the Internet, you have to spend some time to piece these information bits together. This write-up, in contrast, aims to be a one-stop-shop with all the information you need in one place.
All shell commands in the remainder of this post are executed on the Raspberry Pi minicomputer. The most convenient way for me is to ssh into the Raspberry Pi from my development laptop. In case you want to look up how to enable ssh, the official Raspberry Pi documentation on remote access via ssh is a good place to start.
To install the Kubernetes dashboard, you first need to enable it by issuing:
$ microk8s enable dashboard
Later on, you’ll need an access token to login into the dashboard (I’m assuming that Role-based Access Control (RBAC) is not enabled in your microk8s installation (which is the default case)). To retrieve the access token, you first need to run:
token=$(microk8s kubectl -n kube-system get secret | grep default-token | cut -d " " -f1)
microk8s kubectl -n kube-system describe secret $token
The above command will store the token in the shell variable $token. With this, use the kubectl command to view the access token:
ubuntu@ubuntu:~$ microk8s kubectl -n kube-system describe secret $token
Name:         default-token-7rjx4
Namespace:    kube-system
Labels:       <none>
Annotations:  kubernetes.io/service-account.name: default
              kubernetes.io/service-account.uid: 84bdf202-1af7-4d3e-9b79-8203e5feb9de

Type:  kubernetes.io/service-account-token

Data
====
ca.crt:     1103 bytes
namespace:  11 bytes
token:      eyJhbGciOiJSU ...
            ...
            ...
            ...
            ... E4f4Oyc4jiNQ
ubuntu@ubuntu:~$
At the end of the output, there is a long string of characters which is the value of your access token (the tokens are randomly generated for every microk8s installation).
Connecting to the Kubernetes dashboard service from outside of the Raspberry Pi (remember that in my setup I ssh into the RPi) didn’t work at first. I tried several things:
- forwarding the port of the kubernetes-dashboard service using the
microk8s.kubectl port-forwardcommand - creating an additional service of the
NodePorttype and exposing the kubernetes-dashboard through this NodePort - running
microk8s proxyto serve the dashboard on a port I can reach from outside of the Raspberry Pi
However, none of the above worked for me. What finally worked was to edit the kubernetes-dashboard service itself. To do this, issue
$ kubectl -n kubernetes-dashboard edit service kubernetes-dashboard
The above command will fire up a text editor (in Ubuntu 18.04 for Raspberry Pi, vim seems to be the standard one) with the yaml file describing the kubernetes-dashboard service. In service spec section in the yaml file, you have to change type: ClusterIP to type: NodePort and save the file.
Finally, you need to determine the port on which the Kubernetes dashboard is exposed in your microk8s installation using the kubectl get service command like this:
ubuntu@ubuntu:~$ microk8s.kubectl --namespace=kube-system get service kubernetes-dashboard
NAME                   TYPE       CLUSTER-IP      EXTERNAL-IP   PORT(S)         AGE
kubernetes-dashboard   NodePort   10.152.183.26   <none>        443:32164/TCP   57m
ubuntu@ubuntu:~$
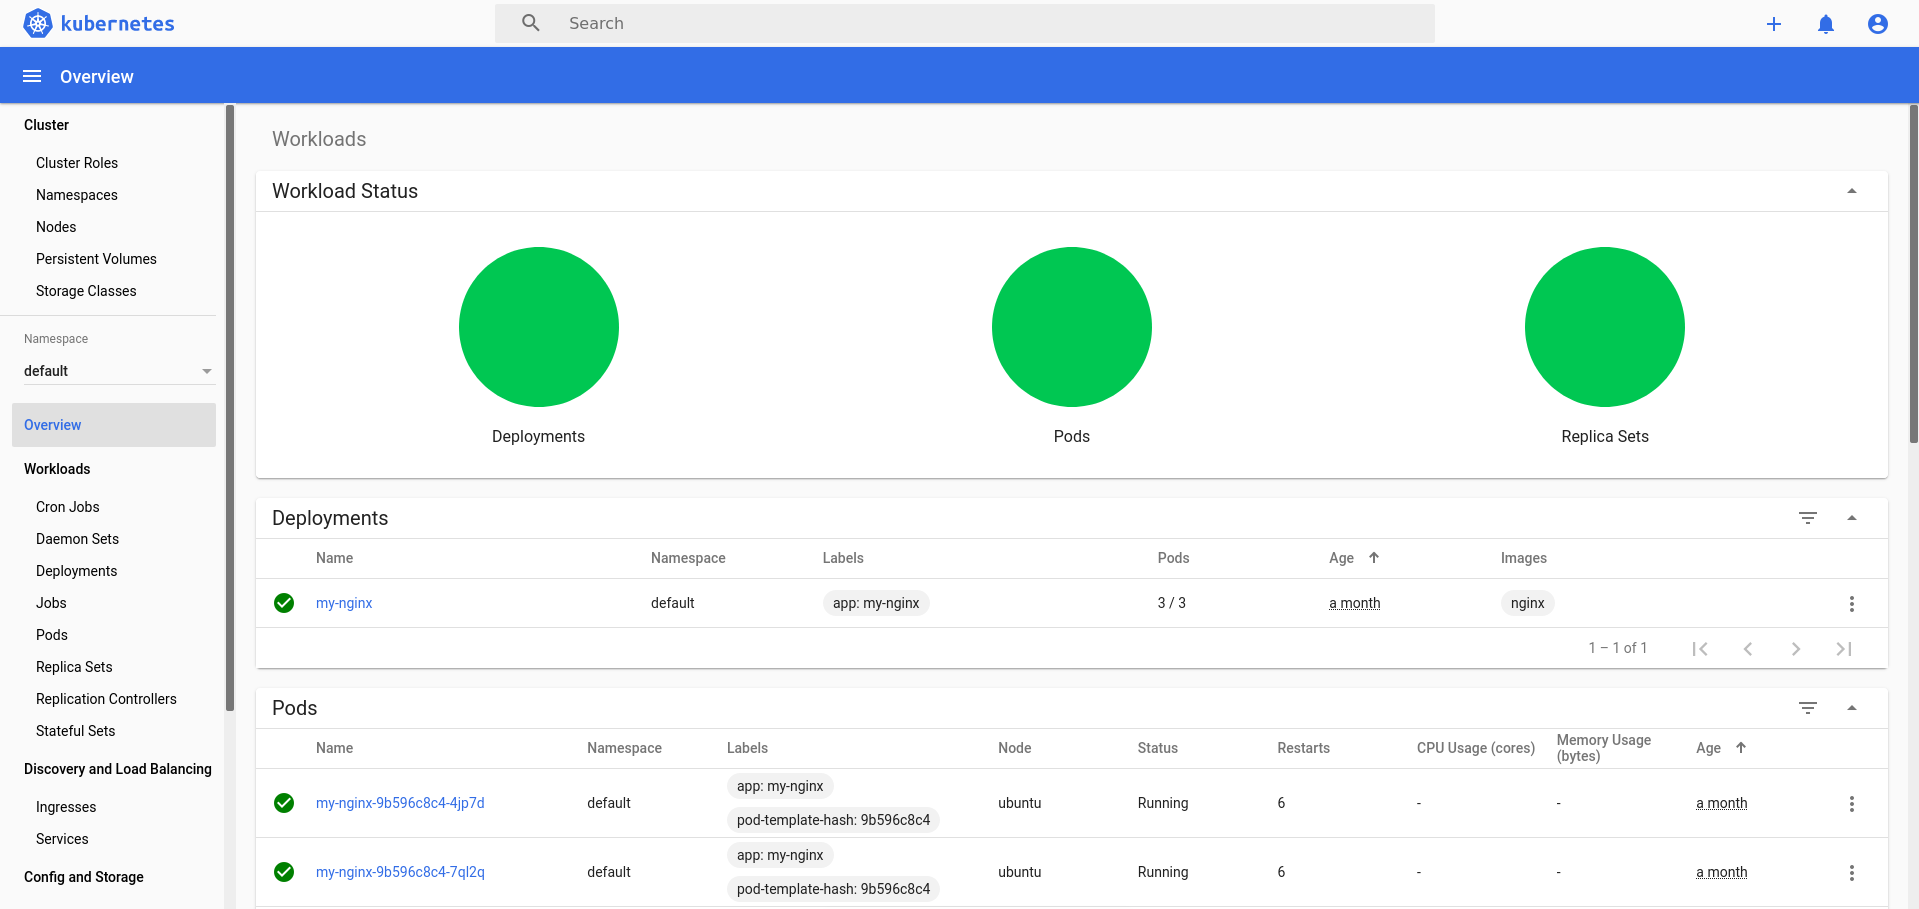
In my case, the port is 32164. You can now access the dashboard by firing up your web browser and pointing it to http://<IP address of your Raspberry Pi>:<NodePort> (in my setup, that would be 32164). This will open the dashboard login page as shown below.
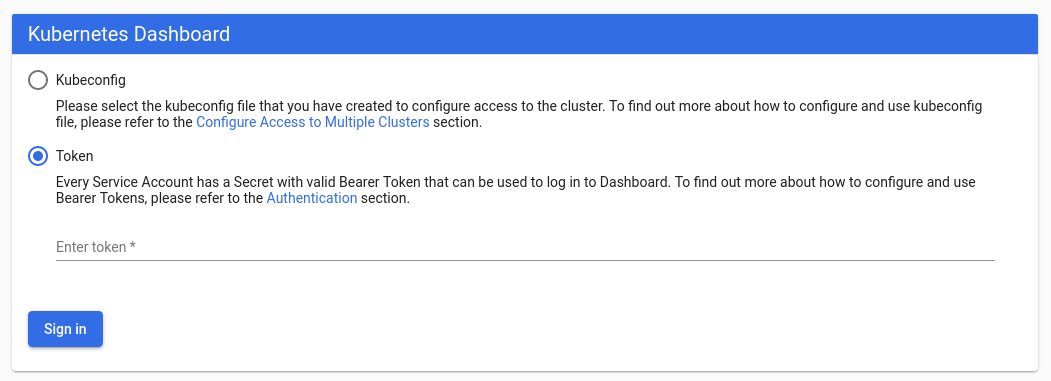
Choose “Token” as the authentication method & paste your token here. You’re done - congratulations! Enjoy your shiny new Kubernetes dashboard!
P.S. If you still experience problems, you should configure the ufw firewall on the Raspberry Pi to allow pod-to-pod and pod-to-internet network traffic:
sudo ufw allow in on cni0 && sudo ufw allow out on cni0
sudo ufw default allow routed